How to Install EA Pip Scalper
The EA Pip Scalper is a new automated trading application for Forex, one that can be used on both MT4 and MT5. This system was just released a couple of days ago, and people seem to be quite happy with it. The EA Pip Scalper system comes loaded to the brim with useful features, and it’s one of the easiest to use autotraders out there.
We have already done an initial review about the user friendliness and the variety of features that this bot comes with. Moreover, we have also demonstrated in previous articles how this particular bot does indeed produce amazing results when trading Forex.
However, with that said, even though the EA Pip Scalper app is very easy to use, some people may have trouble when it comes to the installation of it. Indeed, installing this bot on your MetaTrader 4 or MetaTrader 5 platform is probably the most difficult aspect of this whole thing.
Therefore, today we will be providing you with a complete guide on exactly how to install and set up the EA Pip Scalper Bot. Once you have it properly installed and set up, you will be able to simply activate it to start trading FX currency pairs, and start putting profits in your bank.
Step 1
The first step to successfully installing and applying the EA Pip Scalper to your MT4 or MT5 platform is to actually purchase the bot. Remember, this software costs only $399 to purchase, and yes, this is a onetime payment. There are no additional or recurring fees of any kind. It’s a onetime payment of $399, and that’s it.
To purchase the bot, follow the links to the official site provided here today, and then click on the “buy now” button. Once you make your payment and make the download, you will have everything you need to get started.
On an important note, when you have downloaded the file, you will see that there are actually two files or apps included. One is the file for the EA Pip Scalper for MetaTrader 4, and the other is for MetaTrader 5. So, be sure to select the right file for the version of MetaTrader that you are using.

Step 2
Ok, so for this step, with your MetaTrader open, go to the top left and click on “file”, then click on “open data folder”, and then select “MQL4” for Metatrader 4, or “MQL5” for MetaTrader 5. If you are using MetaTrader 4, click on the MQL4 folder, then inside of that folder, select the “Experts” folder. Now, you need to copy and paste the bot into this experts folder.
You should have another window open, the file where the bot was originally downloaded, the one we spoke of in step 1.
So, here you just need to select the appropriate bot (whether for MT4 or MT5), copy that file, and the paste it into that experts folder. If you are confused as to which of the two files to copy into the experts folder, no worries, you can copy and paste them both into there, and only the correct one will work. Now you can close the window.

Step 3
Now, go to the navigator tab on the left hand side of the screen, click on the “expert advisors” tab, then right click and hit “refresh”. You should now be able to see the EA Pip Scalper included under the expert advisors tab in the navigator tab.
Step 4
Now you need to attach the bot to the platform, and to do this, from the navigator tab, under expert advisors, you will see the EA Pip Scalper. Select it, and drag and drop it onto the platform. You should now see a new pop-up.
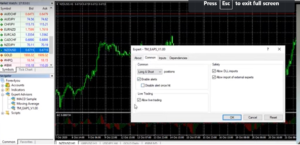
Now you need to go to the “common” tab. Within this tab, you need to make sure that “allow live trading”, “allow DLL imports”, “allow input of external experts” and “enable alerts” are all selected.
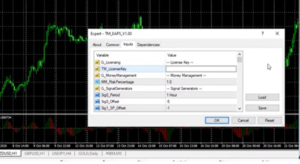
Now, you need to click on the “inputs” section. This is where you will need to enter your license key. When you purchased the bot, you should have received a license key (you should also have gotten the license key in your invoice that was sent to your email). Copy and paste your license key into the requires section. Click on “OK”.
Step 5
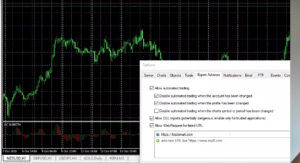
Go to the top control panel and click on “tools”, then click on “options”, then go to the “expert advisors” tab. Once there, you need to make sure that all of the boxes are selected or ticked, all but one. The only box that should not be ticked is the one that says “disable automated trading when the chart symbol or period is changed”.
This is the one that should not be ticked. Everything else should be activated. Click on “OK”. The EA Pip Scalper bot should now be properly installed and applied to your MetaTrader 4 or MetaTrader 5 platform. Now, you can let the EA Pip Scalper app run and place trades for you. Of course, you will also be able to optimize it for the best results, something that we will cover in future articles.
Installing the EA Pip Scalper Bot – Final Thoughts
Folks, if you are still having trouble installing the EA Pip Scalper Bot, remember that it comes with 24/7 support. You are welcome to contact the good people behind this new Forex autotrader for assistance, and they will help you at any time of day or night. We know that there is a killer support team behind this Forex autotrader, one that can surely help you solve any problems that you may be having.
With that said, if you follow all of the clear instructions that we have provided here today, you shouldn’t have any problems getting it to work properly. Remember people, the EA Pip Scalper is probably the highest performing FX autotrader out there right now. It produces amazing results on a daily basis, it’s easy to use, and it allows you to trade all Forex currency pairs too.


